Terrain Object Renderer is included in the MegaWorld workflow. Use MegaWorld to spawn and edit Terrain Object prototypes, then let Terrain Object Renderer handle optimized rendering.Documentation Index
Fetch the complete documentation index at: https://docs.abberia.com/llms.txt
Use this file to discover all available pages before exploring further.
Terrain Object Renderer is planned as a standalone workflow later. Today, the primary workflow is through MegaWorld and Terrain Object resource types.
Workflow with MegaWorld
Use MegaWorld tools to create or edit Terrain Object data, then configure Terrain Object Renderer to render that data efficiently. Start with these MegaWorld pages:Settings layout
Terrain Object Renderer settings are split into three areas: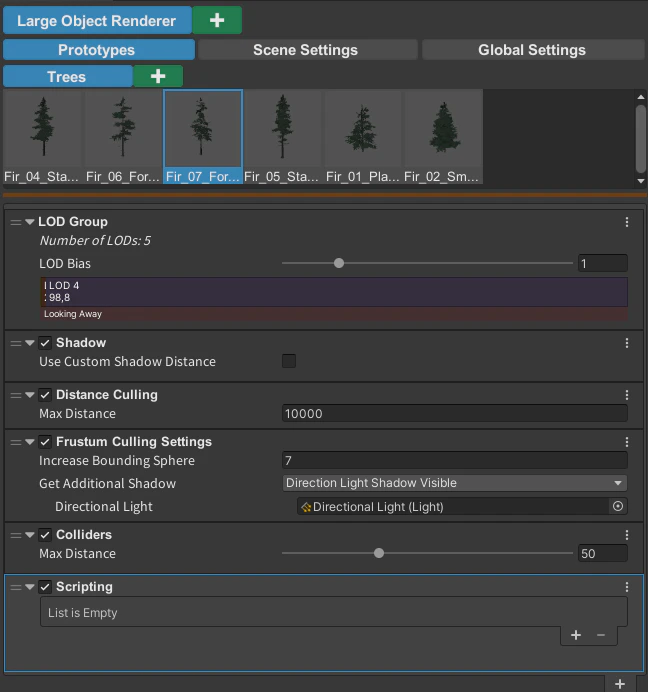
- Prototypes — scene prototypes and their renderer settings. Prototype settings are global, so changes to a prototype apply anywhere that prototype is used.
- Scene Settings — scene-specific settings shared by renderer systems, such as cameras.
- Global Settings — settings that persist when you switch active scenes.
Renderer context menu
Right-click the renderer to open its context menu.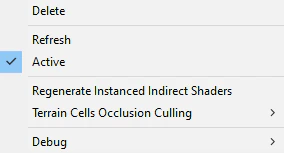
- Refresh — reloads prefab data for rendering. Use it after changing prefab materials, LOD Groups, or terrain setup.
- Regenerate Instanced Indirect Shaders — regenerates shaders created by shader binding. Use it after changing original shaders.
- Terrain Cells Occlusion Culling > Refresh Cells — refreshes terrain-cell data after terrain height changes.
Prototypes
The Prototypes section is divided into Groups and Prototypes. A Group contains prototypes. You can create, delete, rename, and reorganize Groups.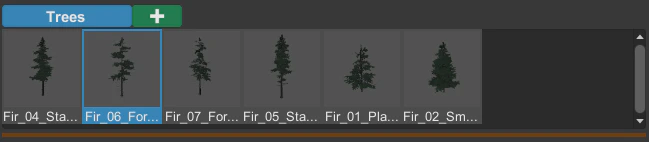
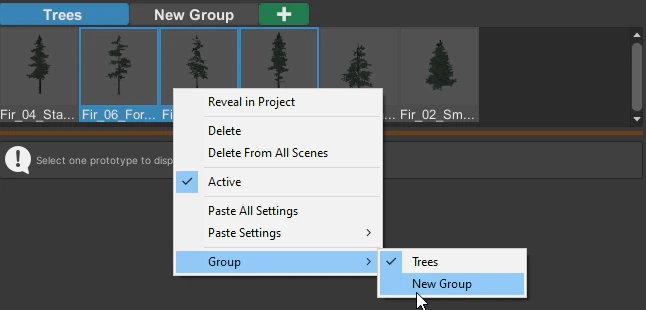
Prototype context menu
Right-click a prototype to open its context menu.
- Reveal in Project — shows the prefab location in the Project window.
- Delete — removes the prototype from the current scene.
- Delete From All Scenes — deletes the global prototype data from the Resources folder.
- Active — controls whether the prototype is rendered.
- Copy All Settings and Paste All Settings — copy or paste every prototype setting.
- Paste Settings — paste selected setting groups.
- Group — move selected prototypes to a Group.
Prototype components
Prototype settings are global. If you edit a prototype setting in one scene, the same setting is used by that prototype in other scenes.LOD Group
LOD settings are visible when the prefab has a Unity LOD Group. HDRP and LWRP do not support LOD Fade, so some LOD Fade settings may be hidden.- LOD Fade — enables fade-style blending between LOD levels.
- LOD Fade For Last LOD — enables fade behavior on the last LOD.
- LOD Fade Transition Distance — controls the distance where LOD Fade ends.
- LOD Bias — adjusts LOD distances per prototype without changing the original prefab LOD Group.
Shadow
Shadow settings control how each prototype casts shadows. Turning shadow casting off can improve performance. If the prefab uses an LOD Group, choose which LOD casts shadows.- Use Custom Shadow Distance — enables a custom shadow distance for this prototype.
- Shadow Distance — sets the distance where shadows are displayed.
Distance Culling
Distance culling limits how far from the camera a prototype can render.- Max Distance — maximum render distance from the camera.
Frustum Culling
Frustum culling prevents objects outside the camera view from rendering.- Increase Bounding Sphere — expands the object’s bounding sphere for culling. Use this when scale changes or shader deformation may otherwise make objects disappear too early.
- Get Additional Shadow — keeps shadows visible when the object is outside the camera frustum.
- Min Culling Distance — disables culling below a minimum camera distance.
- Increase Shadows Bounding — expands shadow visibility.
- Directional Light — tells the renderer which direction sun shadows come from.
Colliders
The Colliders component controls how far colliders appear from the camera or selected objects.- Max Distance — collider distance from the camera or collider source.
Scripting
The Scripting component adds scripting support for rendered instances. If the prototype also has a Colliders component, scripting distance is controlled by the collider distance. Otherwise, the scripting component shows its own Max Distance setting.Scene Settings
Scene Settings are scene-specific settings shared by renderer systems. Terrain Object Renderer adds Cameras and Additional Data here.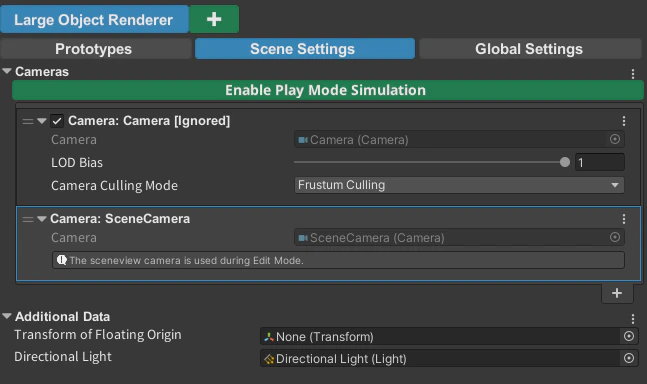
Cameras
Terrain Object Renderer does not scan every scene object to find cameras because that can be slow in large scenes. Add cameras manually to the Cameras list. A camera with the MainCamera tag is found automatically. If you add a camera at runtime, add it through code. Use Enable Play Mode Simulation in Edit Mode to preview how objects render in Play Mode while tuning renderer settings.
- Enabled — controls whether this camera renders objects.
- LOD bias — adjusts LOD distance for this camera.
- Camera Culling Mode — controls how the camera culls objects.
Additional Data
- Transform of Floating Origin — defines the root object used for floating origin offsets.
- Directional Light — provides light direction for Frustum Culling and additional shadows.
Global Settings
Global Settings persist when you switch active scenes.Quality
- Is Shadow Casting — controls whether objects cast shadows.
- Max Render Distance — sets the global render-distance limit for prototypes.
- LOD bias — adjusts LOD distance globally.
Extension
Extensions are optional. The available extensions include:- Unity Terrain Tree Converter
- GameObject Converter
- Snap To Object Ground